
RED VELVET CAKE (RECIPE 2)
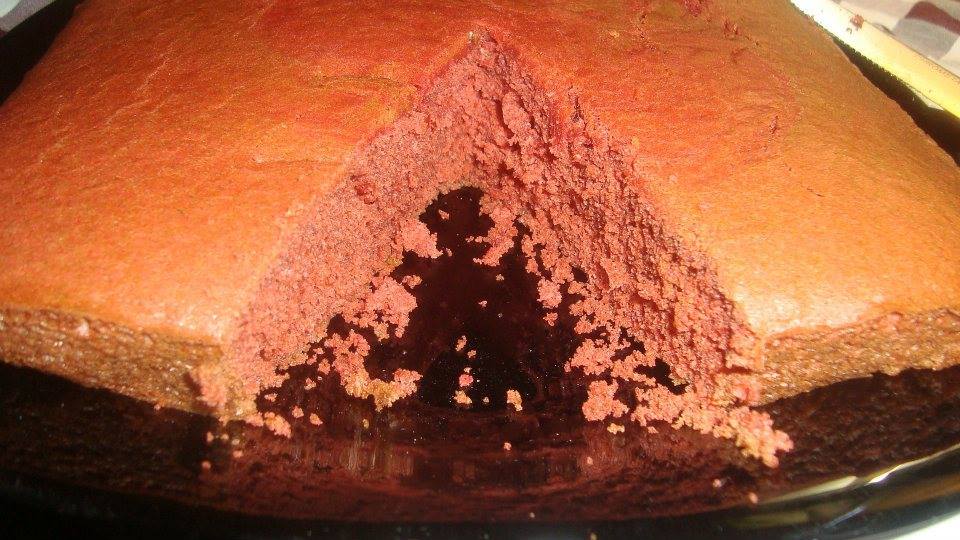
So last Friday I posted my KitKat Red Velvet Cake. The cake was for my girl’s Soraya’s birthday and at some point I thought that the main cake might not be enough so I again begun to bake but decided that I wanted a more RED red velvet cake seeing as the original one was a very deep red I wanted something with a more prominent red. So I searched around and found this recipe at Joy of Baking. It used only 2 tablespoons of cocoa so that sort of guaranteed a redder cake. Like I said last week people seemed to enjoy both cakes. Those who preferred this like it because it was not a “typical” chocolate cake in that u can think you taste the chocolate but you aren’t sure so it’s more intriguing. It was also quite moist and the sugar balance was just right. Hope you will enjoy it too. HAPPY BAKING!!
Ingredients
- 2 1/2 cups sifted all purposes flour
- 1/2 teaspoon salt
- 2 tablespoons cocoa powder
- 1/2 cup) unsalted butter at room temperature
- 1 1/2 cups granulated white sugar
- 2 large eggs
- 1 teaspoon vanilla essence
- 1 cup buttermilk
- 2 tablespoons liquid red food coloring
- 1 teaspoon white distilled vinegar
- 1 teaspoon baking soda
Instructions
Preheat oven to 175 degrees C Butter two – 9 inch (23 cm) cake pans and line the bottoms of the pans with parchment paper. Set aside.
In a mixing bowl sift together the flour, salt, and cocoa powder. Set aside.
In bowl of your electric mixer, or with a hand mixer, beat the butter until soft (about 1-2 minutes). Add the sugar and beat until light and fluffy (about 2-3 minutes). Add the eggs, one at a time, beating well after each addition. Add the vanilla extract and beat until combined.
In a measuring cup whisk the buttermilk with the red food coloring. With the mixer on low speed, alternately add the flour mixture and buttermilk to the butter mixture, in three additions, beginning and ending with the flour.
In a small cup combine the vinegar and baking soda. Allow the mixture to fizz and then quickly fold into the cake batter.
Divide the batter evenly between the two prepared pans and smooth the tops with the back of a spoon.
Bake in the preheated oven for approximately 25 – 30 minutes, or until a toothpick inserted in the center of the cakes comes out clean.
Cool the cakes in their pans on a wire rack for 10 minutes. Place a wire rack on top of the cake pan and invert, lifting off the pan. HAPPY EATING!!
https://www.themothershipvillage.com/red-velvet-cake-recipe-2/MY KITCHEN

Foodie has a new cooker :-). Are you like me who loves loves new stuff, I get excited like a little child when new stuff comes in so I just had to share, maybe my pal Mona would relate. She is one of those people who will come “help” you unpack your stuff when you come from Nairobi, when I had just met her I used to think “wow what a helpful friend” only to later realise its her fetish for new stuff that actually made her help one unpack.
Anyway, I digress.
One of the things I really hated about my Kakuma kitchen at first was cooking with a Meko ( this is a 6kg gas cylinder with a burner) It would take me hours to make a complete meal as I could only make one dish at a time, then I Upgraded to a two burner stove

I was pretty happy but I always wished I could get the four burner but at that time the only available ones were the ones that came with a grill and oven and it was not practical to carry one to Kakuma( although I am still debating on this). So in April when I walked into a Nakumatt Supermarket wanting to buy a “prettier” two burner and saw a four burner table top stove, I was over the moon ( the things that excite you when your from the desert!!!) but unfortunately I did not have the baggage allowance to buy it so I left it and sent my gal Liz for it. The day she arrived I COULD NOT WAIT. I literally run out of my office into her house to get it so that I could go set it up and just look at it 🙂 heheheh . So now I am almost where I want to be all that’s missing is a cooker with an oven but my microwave plays that role for now. For now I will enjoy the four burner and for all of you with two burners its time for an upgrade!
RED VELVET CAKE (RECIPE 1) / KITKAT & M&M CAKE (FAIL)

So my girl Soraya had her birthday last weekend a few colleagues and I thought it would be good idea to do a small party for her. As we were talking about this I was “bright” enough to offer to bake the cake for the birthday as I had been wanting to try two things of late 1. A red velvet cake 2. A kit kat cake. This was overly ambitious of me I think seeing as for one I had made neither before and secondly offering to “decorate” a cake that will be viewed in public is quite a challenge to ones ego. I regretted having offered several times but what else was I do to with time ticking there was not much to do as I couldn’t just pull out and it was a bit late to order for cake from Nairobi so I decided to go on and keep my offer. Since I did not have the kitkats and M&Ms to go with the kitkat cake we called our colleague Allan and asked him to go to the supermarket to get us the chocolates and this proved to be quite a challenge, Allan, being the man he is, called me like 3 times trying to figure out what exactly I wanted and this was quite the task, it was like trying to explain to a man the difference between pink and fuschia!!! (no pun intended 🙂 ) even after we talked he still managed to bring me the smaller sized kit kats (which I did appreciate coz it was the effort that counted) in a panic my girl Mona and I begun to wonder what we would do but we decided to ask another male colleague who did not even know what kit kats were and he this time brought us the chunky ones!!! I was doomed and frustrated. All in all I still got complements because we were in the desert and anything goes here but i feel that this (kitkat cake) project was an utter fail and I will have to redo it again.
For the cake I actually enjoyed it. Every one who ate it was quite happy with the out come. I tried two different recipes, I will post the other next week. I think people equally liked both.

My pal who is not a fun of chocolate cakes actually liked this one because it was not that rich, the chocolate flavour is present but very distant and the cake is very moist because of the oil used. However, because of the amount of cocoa used the red in this cake is not as rich and it turns out to be more maroonish. So if your after color next weeks recipe might be the one to go for. Or try both see what tickles your fancy. HAPPY BAKING!
Ingredients
- 1 tablespoon unsalted butter
- 3 1/2 cups cake flour
- 1/2 cup unsweetened cocoa
- 1 1/2 teaspoons salt
- 2 cups oil (vegetable will do)
- 2 cups granulated sugar
- 3 large eggs
- 6 tablespoons (3 ounces) red food coloring or 1 teaspoon red powder food coloring dissolved in 6 tablespoons of water
- 1 1/2 teaspoons vanilla
- 1 1/4 cup buttermilk
- 2 teaspoons baking soda
- 2 1/2 teaspoons white vinegar
- you will need 36 Kitkat sticks to fill up this cake and not end up with the disaster I had, i should have crossed checked this
- about 1-1 ½ cups of M&MS
- 1 cup unsalted butter softened
- 3 1/2 cups confectioners sugar
- 1/2 cup cocoa powder
- 1/2 teaspoon table salt
- 2 teaspoons vanilla extract
- 4 tablespoons milk
Instructions
Preheat oven to 350 degrees. Place teaspoon of butter in each of 3 round 9-inch layer cake pans and place pans in oven for a few minutes until butter melts. Remove pans from oven, brush interior bottom and sides of each with butter and line bottoms with parchment.
Whisk cake flour, cocoa and salt in a bowl.
Place oil and sugar in bowl of an electric mixer and beat at medium speed until well-blended.
Beat in eggs one at a time. With machine on low, very slowly add red food coloring. (Take care: it may splash.) Add vanilla. Add flour mixture alternately with buttermilk in two batches. Scrape down bowl and beat just long enough to combine.
Place baking soda in a small dish, stir in vinegar and add to batter with machine running. Beat for 10 seconds.
Divide batter among pans, place in oven and bake until a cake tester comes out clean, 40 to 45 minutes. Let cool in pans 20 minutes. Then remove from pans, flip layers over and peel off parchment. Cool completely before frosting.
Cream butter for a few minutes in a mixer with the paddle attachment on medium speed. Turn off the mixer. Sift 3 cups powdered sugar and cocoa into the mixing bowl. Turn your mixer on the lowest speed (so the dry ingredients do not blow everywhere) until the sugar and cocoa are absorbed by the butter. Increase mixer speed to medium and add vanilla extract, salt, and milk and beat for 3 minutes. If your frosting needs a more stiff consistency, add a little more sugar. If your frosting needs to be thinned out, add additional milk 1 tablespoon at a time.
Frost the 1st cake layer. Set the 2nd layer on top of the first. Frost the 2nd layer and along the sides of the cake too.
Stick Kit Kat’s to the sides of the cake, leaving a very small space in between each Kit Kat (1/4-inch).
Wrap a bow around the cake, securing the Kit Kat’s. Fill the top of the cake with M&M’s.
If you refrigerate the cake for a couple of hours or so, it will be much easier to cut and serve. HAPPY EATING!!!
This recipe makes 2-3 cake layers (depending on how big you want each individual cake, i made 2

